Showing posts with label Art quilt. Show all posts

Friday, June 14, 2013

Which one?

For the past 4 or 5 years, I have participated in the annual Flagstaff Open Studios Tour... a two-day event with an average of 75 artists who participate at about 40 studio locations.  To kick off the event, we have a 'Prelude' Exhibit at the Coconino Center for the Arts, starting with an Opening Reception.  This year it will be Saturday, July 27th.  Each participating artist is allowed to show one piece, representative of their artwork to allow patrons to see their art and decide which studios they would like to visit during the Tour... we are spread out all over Flagstaff and the county, so it's a challenge for patrons to get to all the studios!
Having said all that, I have been working for several months on two fiber art pieces, thinking that one would be suitable for the exhibit.  I finished them both yesterday, and now I have to decide which one I will submit:
"Snippets and Squiggles" is done using raw-edged applique, machine and hand stitching with a few buttons as embellishments.  I stitched it directly to batting, then zig-zagged the outer edge.  It is mounted on gallery wrapped black canvas.  Dimensions are 16" x 20", mounted.  Fabrics are a combination of commercial prints and hand dyed fabrics.

"Carnival" is a batik fabric that I have embellished with hand stitching and beaded accents.  The batik fabric was backed with solid color fabric, and I fused the outer edges, then mounted on a 12" x 12" gallery wrapped black canvas.
I have not yet determined what price I will be asking, but each piece took at least 20 hours from beginning to end.
I would love to hear input from anyone who wants to give me their opinion.  Right now, I'm leaning toward "Carnival", because I think it has more artistic merit.  But whichever doesn't go into the gallery will be offered during Open Studios, so they will both be available.  I just know that a larger crowd will see whatever I put in the gallery.  I'm very glad to have 2 to choose from, and that I have finished them so soon.... now I have time to beef up my stock for Open Studios, as well as a slew of other things I'm working on!

Saturday, May 25, 2013

Current works in progress

I've been working on several things at once recently, and keep forgetting to write about it!  For one, I have had a couple of special orders from a new customer, and that always takes priority over things I'm doing for fun.  Got the second one in the mail this morning, so I'm clearing the deck to return to other things.
Another side trip - I do blog visits first thing each morning after I feed the cats and while I'm having my first couple of cups of coffee or cocoa... recently, Deb Lacativa posted about dyeing embroidery floss here and it finally inspired me to get off my duff and give it a try... dug through my tangled mess of floss and pulled out a bunch of white or ecru floss, and dug into my stash of dyes to play:
Here are the first 2 - I've already used some on a project where I'm embellishing a batik fabric:

I've done more on this piece since I took these pictures, but figured I would get it done before I take more.... the swirl at the lower left is done with the yellow/orange/red variegated thread, and the small circle to the right of the swirl is outlined with  some of the blue/green.
Another project I have been working on is a piece I'm calling "Snippets and Scribbles"
I used scraps I accumulated from other projects and just made an abstract composition with them.  Normally, I would have fused them onto a foundation, but I decided to stitch them down this time.  I have used free-motion stitching to attach and do some quilting.  Now I'm looking at how I can use some of my hand dyed floss to add embellishments.  These 2 pieces are quite different for me - I generally do landscape quilts, but since my theme this year is "PLAY", that's what I'm trying to do!  And you know what?  I'm having lots of fun!  More to come...   


Saturday, March 16, 2013

Summer Tie-dye Quilt Class!


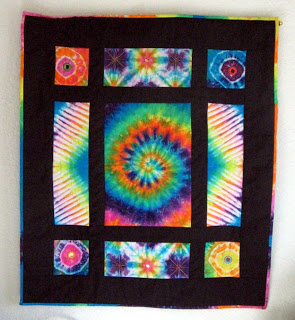
I am really excited to offer my "Stuck in the 60's Tie-Dye Art Quilt Sampler" class this summer!  Please click on 'My On-line Classes' above for all the information... I hope you will join me for a fun project that combines tie-dye with quilting!

Monday, February 18, 2013

Tribute

As I mentioned in my last post, I have been posting about scrunch dyeing techniques at "... And then we set it on Fire", which is a group of fiber artists who specialize in surface design techniques.  After dyeing several pieces of fabric, I challenged myself to use some of it in an art quilt.  I played around with various methods of using the fabric combined with some of my other fabrics (stash buster!), and put the finishing touches on the piece just this morning.  Here's how it ended up:


I hung it on a cafe rod in my bathroom, next to a sunny window to highlight the quilting.  As I mentioned in my post on the other blog, I got some smudges on the center panel when I mistakenly used a graphite pencil instead of a lead pencil to trace the leaf and vine design I later embroidered.  So I decided to finish the piece, then launder it to remove the graphite.  I remembered how I love the three-dimensional quality quilts get when they have been laundered, which in this case, added to the visual interest. Then I went back in with a lead pencil, drew the vine and leaves, and embroidered... just right!  


 In the closeup above, I had a piece of fabric I dyed by covering a button with the fabric and tying with string.  The button had a raised daisy pattern which transferred to the fabric, but it was very faint.  So I embroidered the petals, then used french knots to create the center.  I free-motion quilted the white area around the flower.
This is a closeup of a square I made using some of the scrunched fabrics I dyed for the blog posts.  I used free-motion quilting to highlight the design.


Here I tried to get a closeup of the border, which was created with more of the scrunched fabrics. Again, I used free-motion quilting to meander over the patterns of the scrunch.  And this gives a little better view of the embroidered panel in the center.
I mentioned in the other blog post that I decided to call this piece "Tribute", as a tribute to my Mom, Step-Mother, Grandmothers and Great Grandma, all who were very gifted in various fiber arts, and who inspired me to work in fiber.  But it is also a tribute to the many wonderful fiber artists I have met in the past several years online, who have so generously shared their techniques with the world!  I have learned a great deal from you all, and hope to be able to share what I have learned with many more!

Thursday, January 24, 2013

Study in Contrasts, part 1

Beth Berman has captured my imagination again!  She has been posting recently on Mark Making, but she posted about Visual Exercises here the other day, and it really caught my attention... enough to make a special trip to town to buy some black construction paper!  Her black and white shapes brought me back to some exercises my high school art teacher gave us to study shapes, light and dark, basic design.  Well, this morning I cut out a few shapes with my black construction paper, then I decided to glue them to white card stock to study them.  Here's how they turned out:
This one reminds me of an Easter egg... it started out a circle, but by spreading the black pieces out, it changed the shape to an oval.

For this one, I kept the pieces closer together, so it retained more of the circular shape.

This one was a hoot to assemble!  I did my cutting in the dining room, then had to carefully transport all the pieces back to my studio.  Then came trying to reassemble them in the order they belonged before I glued them to the card stock... I almost blew it, but finally got the last few pieces going in the right direction.  I actually assembled this horizontally, but when I looked at the finished piece, I decided I really like the vertical position better.  I look at these, and realize I can use this exercise to help me design art quilts, just based on shape and contrast.  I can't wait to do more exercises, and may go back to get some grey paper to add to the complexity.  I highly recommend this kind of exercise to anyone who wants to clear their creative palettes and have a little fun, while refreshing their brains!  No doubt, I will be posting more exercises in the coming weeks, and I hope to extend the exercise to using one of my designs for fiber art, then I can do a side-by-side comparison... can't wait to try it! 

Sunday, October 14, 2012

A little Fall Foliage

This time of year, I really crave fall foliage!  Considering that I spent most of my life in Southern California, where we all know the sun shines 360+ days of the year, I can only blame my early childhood for this phenomenon... I lived in Northern California for the first 10 years, mostly in the far north of the state where we did have changing seasons.  Here in Northern Arizona, we do get the Aspens turning, and several other native or compatible species that turn colors, but in our yard, we don't have that many trees that do.  I have several small Gambel Oaks, a Poplar that is just my height, and a couple of Amur Maples that really don't scream 'AUTUMN!!!' the way I would like!  So here is an art quilt I made several years ago... it will just have to do to satisfy my craving for Autumn Leaves!

And here is a batik 'Autumn Leaves' I did a couple of years ago:

Okay, now I feel better.... 

Saturday, July 21, 2012

Last time I posted about my Taos fiber art piece was here, back in May. Well, I finally got back to working on it earlier this month, and finished it! I had already purchased a frame for it, and after I mounted it I put it in the frame and hung it. Trouble is, the glass glare was so bad it really took away from being able to view the scene... so today, I decided to ditch the glass. I have some fiber art pieces in my bedroom that are framed without glass, and have been hung for years with no adverse effects, so I'm done with the glass! Especially since the price of glare-resistant glass is prohibitive! Now I just need to decide if I'm happy with the mat or should replace with mat that is more rigid. The existing mat was behind the glass, and didn't have to be rigid since the glass held it in place. But without the glass, there are slight bulges toward the center of each side. So, I'm living with it right now to see if it detracts, and will decide in a day or two.


This is the piece I will be showing at Prelude Exhibit - our annual exhibit at the Coconino Center for the Arts for participants in the annual Flagstaff Open Studios Tour. So I want it to be as professional quality as I can make it!

Monday, May 23, 2011

Update on Taos Art Quilt

I can't believe I haven't posted about this project since last December!  But then it languished in my studio for quite some time, while I worked on several other projects.  However, I am hoping to have this complete in time to submit to this year's Prelude Exhibit at Coconino Center for the Arts... take-in day is August 2nd, and I need to decide if I want to mat and frame this piece, or complete it as an Art Quilt.  Here is a picture of how it looks now:
I really like the idea of leaving it as a flat piece, rather than adding batting and a backing and stitching... that would make it more 3-dimensional, but I am concerned that it would detract from the design.  On the other hand, I am not well-versed in the technique of blocking, and having it matted and framed would add to the cost.  If I sell it at Prelude, they take a 30% commision, so I would have to up the price to make it worthwhile.  Guess I'll have to give myself a deadline for deciding, because take-in will be here before you know it! 

Friday, February 4, 2011

Quilting class

I signed up for a Beginning Quilting class with my friend Joyce... it's being taught at our local fabric store, Odegaard's.  I took a beginning class about 5 years ago at another shop, but haven't done any traditional quilting since, so I figured it would be good to take a refresher.  Besides, Joyce, who sews professionally --she makes lots of neat products for home and personal use -- has never quilted, and we thought it would be fun to take the class together.  Turns out we're the only 2 in the class, and I know the teacher from our local Quilters' Guild, so it's a very comfortable environment to learn in.
Our first project is a "9 patch", which I'm on my way to expanding to 12 patches to make a small table runner.  The colors and fabrics I chose are good for my home decor, but totally different than colors I use in my tie-dye projects!  See for yourself:
My carpet is dark brown, and my accent colors are rust and dusty blue... this was the best I could do to come up with coordinating fabrics.   But I think it will look okay on the dining table once I get the border on!
Meanwhile, next week we will be starting a Split Rail quilt, which I have done before.  Here's the one I did from my original class:

See what I mean about the colors I end up with?  And the quilt is laying on the carpet, so you can see what I'm dealing with.
Well, for the new Split Rail, I came up with a slightly different color scheme:
Odegaard's carries a large selection of batik fabrics, and I decided to splurge on this one.  Haven't decided what to use for the binding yet, and I may hand-dye fabric for the backing or just use solid color, but I sure like the fabrics I chose for the top... can't wait to get started!

Friday, December 24, 2010

Update on Taos

I can't believe how long it has been since I did any work on my Taos art quilt! Time has a way of flying! But now that all the shows are done for the year, and I have finished the Christmas shopping/mailing, sent out the Christmas cards, and caught up with some household chores, I finally found time to get some more work done on it:
Here is the top next to a copy of the photo I am working from
Here is a close-up of the grassy area I just got some work done on. My biggest challenge has been to find a good selection of thread colors to use on this project! I used hand-dyed fabrics, but I don't (yet!) dye my own thread... that may change soon! In the meantime, I haven't decided if I am going to finish this as a quilted wall hanging, or perhaps mount it in a frame. All the stitching is being done to just the foundation piece. I hope to have the stitching done before the end of the year. I love how it's coming along, and I'm anxious to see the finished piece!
Other than that, I have been building up my wholesale shop and looking for retailers to contact... if you know anyplace in your neck of the woods that might want to buy hand-dyed clothing and accessories, let me know, okay? Meanwhile, you can check out my new shop at www.tiedyejudy.trunkt.com. Let me know what you think of it, okay? Feedback is always welcome! Happy holidays to all!

Monday, October 18, 2010

New Art Quilt Blog

I was invited by Chris Daly to join a new blog, The Art Quilt Blog, which is a wonderful resource for inspiration! There are several other art quilters there who have already inspired me to try some new techniques... check it out!

Saturday, October 9, 2010

Update on Taos art quilt, flower pix

I haven't had much time recently to work on my Taos quilt, but I think I'm almost done with the pine tree on the right side:
I have used 4 thread colors to create the branches and needles, stitching over a piece of hand dyed fabric. I'm not trying to replicate the tree in the photo here... just using the photo for inspiration and letting my artists' creative license take over. I live in an area that has the largest Ponderosa Pine forest anywhere, and I will admit that my tree looks more like the one outside my studio window than the one in the photo! I may come back and add a little more stitching, but for now I'm satisfied with how it's taking shape, and I think I will move on to other areas for awhile...
On another note, I recently took pictures of some Sunflowers growing in the yard, the result of sunflower seeds that the birds missed!

I love these... not quite the giants I think of, but bigger than the Brown-eyed Susans we get here naturally. I'm sure I will need to create something using these as inspiration... just don't know yet if it will be fiber art, or maybe I'll get back into painting again... stay tuned!

Saturday, October 2, 2010

Featured Artist for October

I have been selected to be the 'Featured Artist' this month at the Artists' Coalition Gallery in Flagstaff. We had First Friday Art Walk last night, and had a good turnout, which is pretty standard for Flag... lots of art lovers here! Here's a shot of my wall:


"Prickly Pear Cactus" and "Fallen Leaves" got lots of attention and good feedback.
I was wearing one of my 'Autumn Leaves' batik shirts to stay in keeping with the 'Autumn' theme of many of my pieces. We also had a great display of other artists' work in acrylics, oils, watercolor, pastels, photography, jewelry, mixed media... what a great goup we have in our little gallery! If you get to Flagstaff this month, stop by on Saturday or Sunday. We're at 13 N San Francisco St., Suite 103.

Sunday, September 19, 2010

New Batik

I just finished a new Autumn Leaves batik, similar to the first one I did last year which just sold. I love this design, and batik is the ideal technique to create the varigated colors that are so typical of leaves that turn colors in the fall:

This one is a little smaller than the first one I did, only 10 1/2 X 23 1/4 inches, but it doesn't need to be very large to be noticed! I could do these from now until the cows come home, and not grow tired of the colors, the theme or the feeling I get when I look at them! I have always had a passionate love of autumn leaves, so to find a way to create art that represents them is a real joy for me!

Saturday, December 19, 2009

First scarf done, next art quilt started

I finished my first knitting project today, and I'm very pleased with it. No, it's not perfect, but it looks good enough to wear, so I'm a happy camper! I learned how to cast-on, knit, purl, and cast-off, so that's a good first project. Here it is:


It is a little bulky, so my next project is going to be made with sock yarn, which is a smaller yarn. I'm planning to make a Baktus scarf ala Melody Johnson, who is a wonderful knitter and very generous about sharing her knowledge on knitting, along with a boatload of other wonderful creative talents, so if you haven't browsed her blog, take a moment to stop there... you won't be sorry!
On another note, I want to mention here that I have been a big fan of two other artists who are extremely talented in the fiber arts: Deb Lacativa and Jude Hill. I started creating Art and Landscape quilts just two years ago, and around that time is when I discovered the blogs of these two very talented women, who create 'slow cloth'. They aren't the only ones by far, but they are two who have captured my attention and caused me to look at fiber art from totally different perspectives... thank you both! Not that I have any intention of attempting to 'replicate' your work, because I know that would be a total disservice to you, but you have shown me a number of wonderful techniques that I hope to use in my next project. I started a piece this morning that incorporates my hand-dyed fabrics, and will be hand-stitched, which is a departure from what I have been doing this past two years. I am no stranger to hand sewing or embellishing, but have been using machine sewing and fusing as my basic techniques so far. Oh, and I think it was Jude who posted a link recently to Arlee , who has inspired me all over again to rededicate myself to getting back into embellishing in a big way. So without further ado, here is a sample of what I will be working on for much of the coming months:

I just finished basting the pieces to the foundation, so now I need to study it for awhile and start thinking about how I will proceed. I hope to incorporate a number of techniques, and also plan to use non-fiber components in the piece as well. I will post pix as I go a long, so check back!

Tuesday, August 11, 2009

Freeform Quilt done!

I just finished my freeform art quilt... don't have the hanger right yet, but I couldn't wait to see how it would look hanging:
I did change the piece I originally had in mind for the upper left corner, and think it balances the piece better. Then I flip-flopped over whether to hang it this way or flip it 180 degrees... this way finally won. I used pre-dyed cotton crinkle cloth to bind it, and a commercially dyed fabric for the backing. I still need to add the label. All in all, I'm pleased with how this turned out... I was able to use some of my dyed fabric, AND I successfully created a piece that isn't square or rectangle. Next? Hmmmm.... maybe three dimensional? Why not!

Friday, July 31, 2009

Design board play...

I have been working on ideas to use some of my dyed fabrics for a new art quilt. Today, I started auditioning some fabrics I had pulled out of my stash. I sometimes have a hard time envisioning a design by just auditioning fabrics, but this time I did a little cutting and moving around, and I think I may have a design ready to work on. One of my goals was to create a piece with non-squared edges:
I took the picture on the left from the design board, but then rotated around to create the image on the right. I'm almost thinking I like the one on the right better because the larger piece of fabric is on the bottom, and gives it more of a base. Now I guess I'll let it sit for awhile and see if I still like the composition well enough in a day or two to continue.

Tuesday, July 21, 2009

Art quilt experiments

I dyed a piece of fabric awhile back using CD's and spring clamps to resist the dye:
I set about to quilt and embellish it, but got bogged down after awhile, and it went into the UFO pile.
I decided to pull it out yesterday and cut it apart to see if I could create a series of various sizes. Here are some of the pieces on the design board:


Unfortunately, the stitching doesn't show up very well, but I created closeups that might help:

My plan now is to finish the edges, add more embellishments where needed, then possibly mount on black fabric that is stretched over stretcher bars, or on canvas that has been painted black. And I have some other pieces left that I can also finish in this manner. I'll post more when I have completed some of the pieces. I'm calling them my 'CD Distortion' series, although I'm sure some would look at them and think of SciFi eye monsters!

Monday, February 9, 2009

Woo-hoo! It's show time!

Wow! I just got an e-mail that I will be given the opportunity to show my art quilts in November at the Mountain Oasis International Restaurant in Flagstaff. I just ate there last Friday for the first time, and their menu is fabulous, and the restaurant is lovely! I'm soooooo jazzed! That gives me plenty of time to finish a bunch more work... they prefer to have at least 10 pieces for the show, and I'm at 7 right now. Two of the 7 are pretty small, so I would like to have 10 about the same size range... 21" X 29" is the average. I'm a happy camper!

Saturday, February 7, 2009

Latest work

I just finished up Devil's Postpile, and I really like how it turned out! Not exactly what I originally had in mind... better! Sometimes an idea has to sit on the back burner, simmering for awhile, before it is ready for execution. This was one of those times! Here it is:
This is the third in a series of Rock formations... I have no idea how many more will come about, but rocks is where it's at for me!
One thing that isn't noticible in the picture is the quilting I used around the border... I quilted octagonal shapes in two sizes, representing the shape of the columns when viewed from the top. It's very subtle, but I think if I had used a lighter thread it would have detracted from the overall appearance of the piece. Finished size is 21 1/2" h X 29 1/4" w.