As promised, I did some experiments with thickened dyes, using my new Gelli-Art plate. The instructions caution that using dyes with the plate could stain it, but since I'm a dyer first, a printmaker second, I decided it was worth a try... I was not disappointed! First a confession... I used some thickened dyes that have been stored away for between 6 months and a year, so I am not sure how well they will bond to the fabric... I will see how they wash out. Their thickness ranged from almost runny to one that had the consistency of jellied cranberry sauce... quite a range! Here's the story:
My work area set up... the fabric is muslin, pre-soaked in soda ash solution and dried. Then I used a dry iron to press out the excess wrinkles.
Here is some of the dye I rolled out onto the plate with a brayer... notice how it kind of shrinks, leaving a natural pattern? This didn't happen as much with the thicker dyes, but I did think it was interesting!
This was really interesting, and I took a print from it... came out nice!
This is the back of the fabric as it lay on the plate.
Here, I used a texturizing tool to create a pattern.
My first two prints - the bottom is the print of the plate shown above.
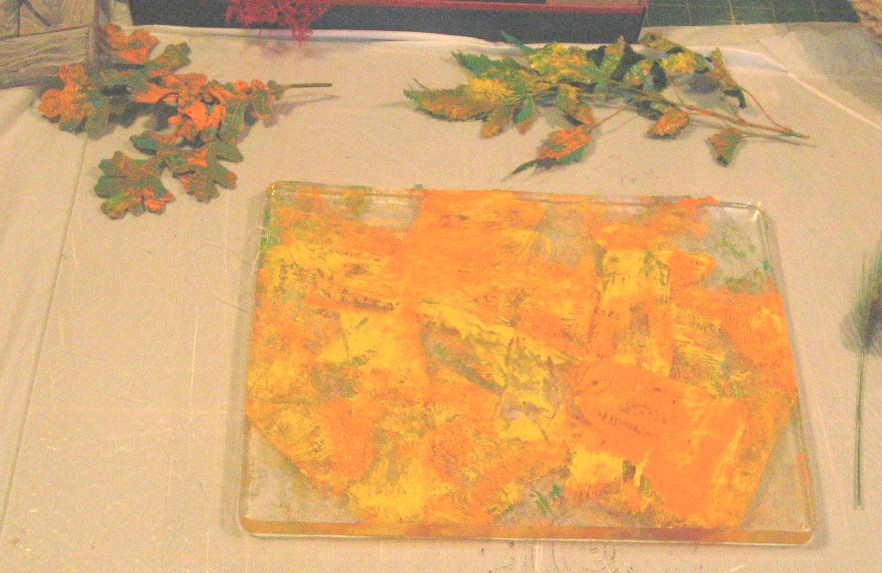
I have placed a glob of the thickest dye on the plate here - I brayered it out, then texturized it below.
Here are the last 2 prints.... I like them a lot! And as I said, the dyes did not stain the plate. I cleaned it off with water and a little hand soap, then dried with paper towels, returning it to its original package. My next step will be to mix some fresh dyes with the new Superclear thickener I just bought from Dharma Trading... I think I will get more consistent results thickness-wise, and hope the colors of the dyes will stay vibrant.
Day 2 of printing with thickened dyes
I was going to mix some fresh dyes, but decided to continue with what I already had on hand:
Here's a shot of the plate after I spread some Robin's Egg blue dye over it.
Day 3's Green print overprinted with the Robin's Egg blue
I cleaned the blue off the plate, and loaded with thickened Fuchsia, then brayered it... again, the dyes shrink back from the plate, leaving interesting patterns. But I had wanted to use one of my stamps to create a design, so I attempted to stamp before covering with my fabric.
You can barely see the stamped design...
This is one of the dark pieces I printed yesterday... now it has mostly fuchsia blended with it, but I really like how it looks!
Here, I used golden yellow and fuchsia, leaving them side by side.
I took another of my prints from the previous day and overprinted with the yellow-fuchsia combo...
Above is the back of the print, and below is the front.
And finally, I over printed the last piece from the first day of dye printing, using fuchsia and the same texturizing tool to cross over the original print.
I wrapped the pieces in plastic, jelly-roll style, and batched for about 24 hours. Here they are after I laundered them:
The Robin's egg blue came out quite a bit lighter, as did the green. The other colors held up well, and I'm very pleased with the result. I will definitely be using my Gelli-art plate with thickened dyes again in the future!