Saturday, June 30, 2012

September class

Sooo.... the students were hardly out of the driveway following the Tie-Dye Batik class last Saturday when my mind turned to planning for the upcoming Surface Design class September 8th! We are planning to cover several techniques, and I've been busy this week totally turning my studio upside down as I create samples of fabric using stamps, stencils, and other items to transform plain white fabric into one-of-a-kind fiber art! Here's a couple of photos of my studio taken this morning:

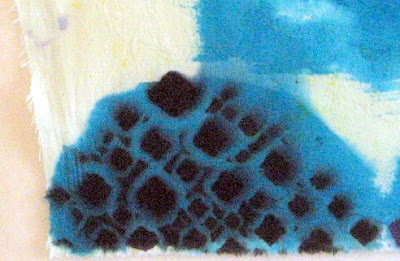
I finally had to get out of there for awhile... my Virgo self is screaming to straighten everything up and bring some order into the area, while my "Wild Child" is on a crazy trip... pulse quickening, head racing... too much stimulation! Here is a sample of a couple of things I'm working on:

These are just test prints, and I'm using up some thickened dyes I've had for awhile. I hope to complete some actual samples for the class that would include dyed fabric that uses several of the techniques to create a fabric that could be used for quilts or other fiber art projects. Several years ago, I participated in a couple of 'round robins' using a variety of techniques, and here's a covered notebook I made using one of the fabrics:
I'm really excited about this class, and hope to make it a veritable banquet of Surface Design techniques for the students! More to come...
Update: the class had originally been scheduled for August 4th, but due to scheduling conflicts has been rescheduled for September 8th, so I just updated the info above!

Sunday, June 24, 2012

Tie-dye and Batik class


Yesterday was my Tie-dye and Batik class, held in my garage since the wind decided to blow a little too hard for us to be out on the driveway! I decided to create a photo album to show the class, and hopefully some of the results as students send me pictures. You can see the album here. There were 5 students - two had taken a class from my friend Wendy and I earlier this month, the other 3 were new (to me). I might also mention that this was my first solo teaching gig, and I'm very pleased with how it went! I spent a lot of time preparing the lesson plan and handout, and in spite of a couple of supply glitches, I think it was a great success. I handed out surveys at the end of the class, and got very good reviews from the 4 who returned them to me, and hope to see them in future classes. Which reminds me, Wendy and I have a play date on July 8th to start working on the techniques we will be teaching in our August 4th class... gonna be lots of fun! More to come...

Wednesday, June 20, 2012

Stencils and masks

Remember the post I wrote here about stenciling? Well, I got a brainstorm the other night (I do some of my best thinking when I'm laying there, unable to sleep!). What if I masked off an area of fabric with freezer paper, then stenciled the area in between the masks? I'm sure this is not a new idea, but it just captured my imagination! So today, I decided to give it a try:
I drew a curved line across a piece of freezer paper, then cut it with my rotary cutter. I spread it out to create an opening for the stencil, then pressed it onto the fabric which I pre-soaked in soda ash solution and dried. I positioned the stencil over the left side of the fabric covering the opening between the pieces of freezer paper, then I daubed on thickened black dye with a foam brush. Once I reached the other end, I carefully lifted the stencil and wiped off the dye from both sides. Then I carefully laid it over the undyed portion of the exposed fabric, and repeated. Afterward I carefully lifted off the pieces of freezer paper. So now what? Truly, I have no idea... YET! I am totally in experimental stages with this technique, and I'm just letting myself play with it to see what I can achieve using stencils and dyes. The freezer mask was a brain-storm, and I think it is a good mix of the two techniques to create interesting fabric. More will be revealed...

Saturday, June 16, 2012

33 Ways to stay creative

Our daughter in law posted this on facebook, and I saved it and printed it out to tape on my wall next to the computer. It's not that I don't find ways to stay creative, but it's a good reminder of how to avoid restrictive behaviours that suck our creativity dry! I especially like #24! My first inclination was to go in and edit it to align the number, then I read the description... oh, yeah!
Food for thought:

Friday, June 15, 2012

Interesting results

The other day I posted about using dyes with stencils to see how the dye would react. I did one segment with thickened dye, and the other with dye that was regular consistency. The regular dye bled a little, but the slightly thickened did not. Later, I decided to paint regular consistency dye over the stenciled area to see how that would react. And since there was some unused area on the fabric I was testing on, I added another test: using Elmer's blue school gel glue, but instead of applying with the bottle tip, I poured some in a plastic pan. One part of the experiment was to use a thick cardboard tube to stamp on the glue, then on another section, I used a foam brush to apply some of the glue as a resist. In both cases, it was a little difficult to get a clear application of the glue. Since it is very sticky, it didn't transfer too well. Once it dried, I brushed dye over the area, at the same time I overdyed the stenciled area. Here are some pictures of the results:
This is the area that I stenciled with thickened dye. I was surprised that it seemed to bleed after I applied the overdye of blue. What really amazes me is how it now has a three-dimensional appearance! No idea if I can replicate that, but I'm game to try!
This is the area stenciled with un-thickened dyes. The three-dimensional quality is not present here... another 'huh?'! Good to know.
Finally, here is the section where I experimented with stamping and painting on the gel glue. This was an attempt to mimic soy wax as a dye resist, and the results aren't as good as if I had applied it with the glue bottle; however, it still has possibilities. If the effect I'm trying for is muted, light/dark as opposed to stark markings, then it could be useful. But overall, I don't think I will be using this application much. So back to the stencils and let's see what else I can do with them!

Thursday, June 14, 2012

More batik on Twill

Remember this?
Well, I did a little more waxing and overdyed it with black, and here it is now:

Above is the side I waxed and dyed on. I got a little heavy handed with the black in spots, but I'm still pleased with the overall result.


This side is the back, and it's a good way to see that the wax and dye both penetrated the fabric, even though it's a heavier weave than the muslin or kona cotton I usually use. This is part of the scrap pile I got from my friend Joyce, and I'm going to really enjoy playing with them! Just need to figure out how I want to finish these. More to come, I'm sure!

Wednesday, June 13, 2012

Stenciling with dyes

Not long ago, I saw a post on Jane LaFazio's blog where she had spray painted some string bags using stencils to create patterns, and I fell in love with them!  But my mind always works a little differently, and what I decided to try was stenciling with dyes, not  paints.  Well, I ordered some stencils, even got the DVD she suggested by Linda Blinn, just to get grounded in the techniques they use.  So today, I decided to start playing to see what kind of results I would get.  Here is my first attempt, using un-thickened dyes:

I used some medium orange, then added some fuchsia, just to see how the dye went on, and if it would bleed.  I used a foam brush to daub on the dyes through the stencil opening onto a piece of fabric that was pre-soaked in soda ash solution, then allowed to air dry.  This is a scrap of fabric I had used to test monoprinting on from another play session, so I decided to add the stencil to it.  After awhile, I came back into my studio to check the fabric, and it held up pretty well, although there is some bleeding on the edge.  

This time, I used thickened black dye to create the pattern... it's not terribly thick, but the consistency is not as runny as un-thickened dye.  I'm happy to say there is no running on this area, even though I overlapped on the edge as I did with the first round.  So this tells me that a) I don't need a lot of thickener to stencil with dye, and b) this is a great way to introduce pattern on cloth without the use of paint.  I love paint, don't get me wrong!  But  my aim is always to find ways to create wearable art, and there is nothing less attractive to me as a garment that has been stiffened by paint, or one where the paint is curling or cracking due to exposure to heat over time.  Being able to use dye in this way is very exciting, and I can't wait to do some more experimenting!  I will post more soon...  

Monday, June 11, 2012

Experimenting on twill

After my friend Joyce finished making up the Golf Cart seat covers, she had a huge number of small cotton twill scrap pieces left over.  Joyce has a business making a number of products but uses commercial fabrics exclusively, so she had no real use for these scraps.  So when she offered them to me... white cotton... I mean, how could I say 'no'?  This is like a whole toyshop full of toys for a kid!  So I now have them in a bin, and decided to use one to test how the fabric would take soy wax batik.  It's pretty thick, compared to the muslin I use in my dyeing and batik projects, but I have ideas for products using this fabric.  So, I am in the process of doing a couple of tests, and here is my progress so far:
I stamped batik onto the pre-soda soaked fabric, then used a foam brush to apply some unthickened dyes, then set it to batch last night.  My plan now is to apply some more wax, then paint on more dyes.  I have used this technique for other 'samplers':

This is a great way to play with dye and wax, and you never know how it's going to come out!  Soon, I hope to try my new stencils with some dye... need a few more items to get ready, but with all those scraps of fabric I will be elbow deep in colorful fabric pieces before long!


Sunday, June 10, 2012

Student fabrics

Here are some of the fabrics created by our students in the recent "Pigments of your Imagination" class:
Lori's foldy-twisty collection

Lori's Mandala

Suzanne's color crossover

Aly's fan fold

Aly's PVC flowers

Aly's Spiral

Love these!  And I hope to post more soon from Norma and Marianna... stay tuned!

Sunday, June 3, 2012

Saturday's Dye class

Saturday, my friend Wendy and I taught the "Pigments of your Imagination" class to 5 lovely ladies in Wendy's garage, which has become THE place to take dye classes!  


Here's our happy bunch toward the end of the day.  What a blast!  Just like finger painting for grown ups, only we weren't acting too grown up!  Yeah!!  Wendy (center in the dark top) taught the first half, focusing on solid color, single color gradation and color crossover.  After lunch, I demonstrated folds and how to apply the dyes with squeeze bottles.  By 3pm we were all worn out, and the ladies had lots of samples to take home and batch overnight... I'm waiting anxiously for photos of their work.  Meanwhile, here are some pix of the samples I demonstrated:
Double Rainbow Swirl

Flower

Double "Ess" accordion fold

Two color scrunch

Soon as I get some pictures of the students' work, I'll post for all to see.  Great way to spend a Saturday... dyeing with the gang! 


Saturday, June 2, 2012

Final product

Just a followup to the previous post about the batik poncho.  My original plan was to do some more stamping with wax over some of the dyed areas, but I decided instead to paint wax on with a foam brush, to preserve more of the dye colors I previously painted on.  The final step was to add black dye using Low Water immersion... less dye than a traditional dye bath, and it left some areas undyed.
The big challenge was using hot water to melt the wax without damaging the rayon fibers!  I ran it through a gentle cycle in the washing machine with two rinses, but when I pulled it out, there was still a lot of wax adhering to the fabric, and I had gobs of wax in the bottom of the washer!  I tried hand rinsing with hot water in a bucket, and it removed some of the wax, but I ended up running it through another full wash with hot water... then the wax was finally gone.  Here's the finished piece:

Although the fuchsia dye faded, the other colors remained strong and clear!  I'm very pleased with my first experiment with wax on rayon... hope it's only the first of many!