Showing posts with label gelli-art printing. Show all posts

Thursday, June 13, 2013

Gelli-Art prints with thickened dyes

As promised, I did some experiments  with thickened dyes, using my new Gelli-Art plate.  The instructions caution that using dyes with the plate could stain it, but since I'm a dyer first, a printmaker second, I decided it was worth a try... I was not disappointed!  First a confession... I used some thickened dyes that have been stored away for between 6 months and a year, so I am not sure how well they will bond to the fabric... I will see how they wash out.  Their thickness ranged from almost runny to one that had the consistency of jellied cranberry sauce... quite a range!  Here's the story:
My work area set up... the fabric is muslin, pre-soaked in soda ash solution and dried.  Then I used a dry iron to press out the excess wrinkles.

Here is some of the dye I rolled out onto the plate with a brayer... notice how it kind of shrinks, leaving a natural pattern?  This didn't happen as much with the thicker dyes, but I did think it was interesting! 

This was really interesting, and I took a print from it... came out nice!
This is the back of the fabric as it lay on the plate.

Here, I used a texturizing tool to create a pattern.


My first two prints - the bottom is the print of the plate shown above.

I have placed a glob of the thickest dye on the plate here - I brayered it out, then texturized it below.


Here are the last 2 prints.... I like them a lot!  And as I said, the dyes did not stain the plate.  I cleaned it off with water and a little hand soap, then dried with paper towels, returning it to its original package.  My next step will be to mix some fresh dyes with the new Superclear thickener I just bought from Dharma Trading... I think I will get more consistent results thickness-wise, and hope the colors of the dyes will stay vibrant.  

Day 2 of printing with thickened dyes
I was going to mix some fresh dyes, but decided to continue with what I already had on hand:
Here's a shot of the plate after I spread some Robin's Egg blue dye over it.


Day 3's Green print  overprinted with the Robin's Egg blue


I cleaned the blue off the plate, and loaded with thickened Fuchsia, then brayered it... again, the dyes shrink back from the plate, leaving interesting patterns.  But I had wanted to use one of my stamps to create a design, so I attempted to stamp before covering with my fabric.

You can barely see the stamped design... 

This is one of the dark pieces I printed yesterday... now it has mostly fuchsia blended with it, but I really like how it looks!
Here, I used  golden yellow and fuchsia, leaving them side by side. 

I took another of my prints from the previous day and overprinted with the yellow-fuchsia combo...
Above is the back of the print, and below is the front.  


And finally, I over printed the last piece from the first day of dye printing, using fuchsia and the same texturizing tool to cross over the original print.
I wrapped the pieces in plastic, jelly-roll style, and batched for about 24 hours.  Here they are after I laundered them:
The Robin's egg blue came out quite a bit lighter, as did the green.  The other colors held up well, and I'm very pleased with the result.  I will definitely be using my Gelli-art plate with thickened dyes again in the future!

Monday, June 10, 2013

More Gelli-Art experiments

I posted here a few days ago about my new Gelli-Art printing plate, and wanted to keep you posted on my further experiments.  I started with acrylic artists' paints on day one.  Today, I did some experiments with Tulip fabric paints I had in my collection, and tomorrow I plan to try thickened dyes.  Also, I am using a stencil and some hand made stamps in today's experiments - the first day, I used some grasses and leaves collected from my yard.  Below are some pictures of my process and results today:
First, I prepared my work area, selecting what paints I might want to use, getting my tools out and creating a stack of fabric pieces to work with.

I dug out my stencils and stamps... even found one rubbing plate, although the others are hiding somewhere!

I decided to use some Tulip Neon Fabric paints in Yellow, Orange, Lime Green and Hot pink.  Did not know until after the first print that they have glitter in them!  Anyway, above is my first print using a stencil from The Crafters Workshop... nice, not too heavy in pattern, and I actually remembered to pull the ghost print (see left side of picture). 

I reloaded the plate, this time adding the hot pink, and selected one of my hand made stamps to do multiple stampings... see photo below for the finished print.

Added more paint, and used another hand made stamp

Love the colors on the stamp!  And darn it,  I forgot to pull a ghost print!  Just about this time, my camera told me to replace the batteries, and unfortunately, these paints dry really fast!  So All I got was the print from the plate.

Here are the first two prints... I like how both of them came out.

This one was disappointing, but it's because the paints dried so fast that they did not adhere well to the fabric... if you look closely, you will see that they are curling on the top of the print.  But I can't blame the plate for that! 

This is a closeup of the first print, to show off the ghost print.
After two days of using paints, I am looking forward to using thickened dyes tomorrow... they stay wet a lot longer, so I'm sure to get some interesting results without having to rush so much!  I have pre-soaked some cotton muslin in soda ash solution, and they will be dry soon.  And I have a fresh supply of thickener to mix the dyes with, so I'd better get to it so I will be ready for tomorrow's session!  Bye for now...

Saturday, June 8, 2013

My new toy!

As you may recall, I am a Resident Artist over at "... And Then We Set It On Fire" which is a blog devoted to learning and using various Surface Design and fiber arts techniques.  This month, Judith DeMilo Brown is hosting, and she and 3 guest artists are covering how to use the  Gelli-Arts Gel Printing  plate.  I have been eyeing these for quite awhile, and this was my opportunity to dive in and get some first hand instruction on how to use them!
As you will read if you check out the posts this month, you can use acrylic paints or craft paints on paper and fabric.  But I am also planning to experiment with thickened dyes, although Gelli-Arts cautions that the gel plates will be stained by dyes.  I am not concerned with that, and really want to try dyes so I can see if they would be useful for dyeing clothing items.  But first, I need to get comfortable using the plate, so this morning, I decided to try using acrylic paints.  I didn't get a lot of pictures... this is a fast-paced technique since acrylics dry so quickly, but I did manage to get some:

Here is my work space.  I decided to use some fabrics from my stash that were various sized, and were probably (but not guaranteed to be!) cotton.  Since I am not using dyes here, I did not have to do any preparation of the fabric other than a quick press to remove wrinkles.  I had gathered some leaves and weeds from the yard to experiment with, but had other items on hand just in case I wanted to use them. 

This is the back of my first piece after I had loaded the plate with paints and placed some of the leaves.

Here is the first print; background is the plate with the leaf clusters still in place.

This is a ghost print of some fox tails in the foreground; in the back is the plate with some new colors waiting to be brayered.

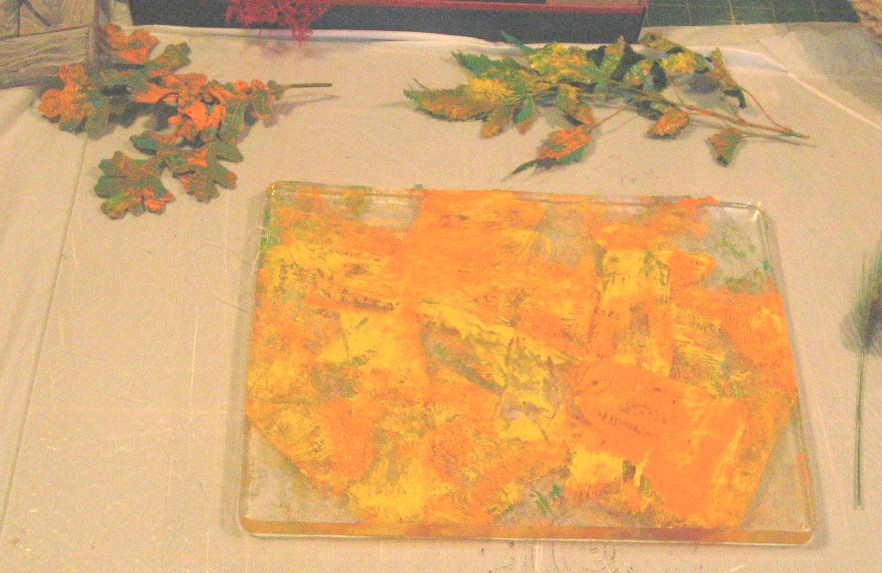
Paint spread on the plate, waiting for the next step.

A print with some netting

  Here are the prints from the first session.  I'm very pleased with the upper right and both prints in the middle.  The others will work for backgrounds, and I'm not necessarily done with the ones I really like!  I will study these before trying the process with craft paints and thickened dyes, but I definitely think I will be doing a lot with my Gelli-Art plate in the coming months!