Showing posts with label dye experiments. Show all posts

Wednesday, November 28, 2012

Lots of things in the works

Quite often, I tend to work on one project at a time... seems like it's more efficient and allows me to crank out things at a faster pace.  However, once I have done my last show for the year, with no shows coming up until the middle of next year, I like to spend time experimenting with new techniques, or trying new twists on old favorites.  So here are some shots of a few things I'm working on right now:
This is a lousy photo, but the best I could get... I have traced leaf shapes onto muslin in preparation for batiking them, then I will overdye with background colors.  After I batch the piece, I will wash out and hand paint the leaf shapes with dyes.  This is a variation on the normal method I use, and I decided it would be fun to see how it turns out this way.  I'll post more as I progress with this piece.

This is a 1/2 yard piece of muslin that I decided to try dyeing a little differently than I usually do.  I would normally pre-soda soak the fabric, scrunch it up and pour the dyes over, letting it batch for an hour before the rinse/launder step.  Today, I wanted to see what would happen if I put ice cubes over the scrunched and dyed piece, thinking that the ice cubes would serve to dilute the dyes as they slowly melted.  I see a little difference between this and regular scrunch dyeing, but not a whole lot.  No fear... I have several other ideas in mind that I plan to try over the coming months.  And in February, I plan to publish them on a blog where I am a Resident Artist... keep a look out!   

Here, I have created a basket weave on a dyed scarf using soy wax, and when my order comes, I plan to use Dy-Na-Flo to overdye the unwaxed area.  I have discovered that multiple dye baths don't work on silk like they do on cotton, so I am playing with fabric paints to see if I can get a good result without leaving the fabric stiff... more on this soon!
As you may have seen in recent posts, I'm also doing a lot of stamping with fabric paints and rubber stamps, and plan to do a lot more of that as soon as the Dy-Na-Flo arrives.  I'm probably going to need to order a lot more of that... poor planning on my part, but I didn't realize that the fabric paints available in today's market are far superior to any I tried 15-20 years ago!  Progress... anyway, I'll keep you posted on my progress!

Monday, July 2, 2012

A new addiction, aka "I'm a glutton!

Jeez.... just when I think I have tried everything, something comes along to lure me into a new addiction! No, I'm not on drugs... unless you want to consider dyes a mind-altering substance. Now that I think of it, maybe they are! I don't snort 'em, or smoke 'em, or swallow them, but I do love to apply them all over fabric. For years, I have enjoyed tie-dye, but that was just a gateway drug to ice-cube... that's right! ICE-CUBE parfait dyeing! I happened to pick up a copy of the June/July issue of Quilting Arts magazine... put it aside for a few days, then browsed through it one day while I was eating my lunch. The article that grabbed me was 'dye your own iced parfait' by Carol Ludington. Now, I have done my own version of dyeing that involved freezing my scrunched fabric or garment in a small container, then pouring liquid dyes over and letting it batch for hours... nice alternative to regular low water immersion dyeing. But this method uses ice cubes and dye powders direct from the jar, in layers with each layer covered with ice cubes and sprinkled with dyes. I had to try it!
I chose Golden Yellow, Bronze, Deep Orange, Scarlet, Olive Drab and Lapis for my color pallet. Fortunately, I have a nice tall covered plastic container, and tore up some muslin to create six fat quarters, then I dove in. This morning, having batched the bunch overnight, I rinsed and laundered them. As I pulled each piece from the batching bucket, all I could think of was "OMG... they look like clean-up rags!". And at that point, they did. However, once they had been rinsed, laundered, dried and pressed, it was a whole different story! See what you think:


I applied different combinations of the above colors to each piece, and they were laid one on top of another, so there was some seepage through the layers as the ice cubes melted. I am thinking I want to try stretching one over canvas stretcher bars, or over a pre-stretched canvas, to see how they would look mounted. There is way too much complexity to try stitching, so maybe I'll just let the parfaits speak for themselves. Needless to say, this is not the last you'll see here about iced parfaits! I'm hooked...

Thursday, June 14, 2012

More batik on Twill

Remember this?
Well, I did a little more waxing and overdyed it with black, and here it is now:

Above is the side I waxed and dyed on. I got a little heavy handed with the black in spots, but I'm still pleased with the overall result.


This side is the back, and it's a good way to see that the wax and dye both penetrated the fabric, even though it's a heavier weave than the muslin or kona cotton I usually use. This is part of the scrap pile I got from my friend Joyce, and I'm going to really enjoy playing with them! Just need to figure out how I want to finish these. More to come, I'm sure!

Monday, June 11, 2012

Experimenting on twill

After my friend Joyce finished making up the Golf Cart seat covers, she had a huge number of small cotton twill scrap pieces left over.  Joyce has a business making a number of products but uses commercial fabrics exclusively, so she had no real use for these scraps.  So when she offered them to me... white cotton... I mean, how could I say 'no'?  This is like a whole toyshop full of toys for a kid!  So I now have them in a bin, and decided to use one to test how the fabric would take soy wax batik.  It's pretty thick, compared to the muslin I use in my dyeing and batik projects, but I have ideas for products using this fabric.  So, I am in the process of doing a couple of tests, and here is my progress so far:
I stamped batik onto the pre-soda soaked fabric, then used a foam brush to apply some unthickened dyes, then set it to batch last night.  My plan now is to apply some more wax, then paint on more dyes.  I have used this technique for other 'samplers':

This is a great way to play with dye and wax, and you never know how it's going to come out!  Soon, I hope to try my new stencils with some dye... need a few more items to get ready, but with all those scraps of fabric I will be elbow deep in colorful fabric pieces before long!


Saturday, June 2, 2012

Final product

Just a followup to the previous post about the batik poncho.  My original plan was to do some more stamping with wax over some of the dyed areas, but I decided instead to paint wax on with a foam brush, to preserve more of the dye colors I previously painted on.  The final step was to add black dye using Low Water immersion... less dye than a traditional dye bath, and it left some areas undyed.
The big challenge was using hot water to melt the wax without damaging the rayon fibers!  I ran it through a gentle cycle in the washing machine with two rinses, but when I pulled it out, there was still a lot of wax adhering to the fabric, and I had gobs of wax in the bottom of the washer!  I tried hand rinsing with hot water in a bucket, and it removed some of the wax, but I ended up running it through another full wash with hot water... then the wax was finally gone.  Here's the finished piece:

Although the fuchsia dye faded, the other colors remained strong and clear!  I'm very pleased with my first experiment with wax on rayon... hope it's only the first of many!

Wednesday, May 30, 2012

Work in progress

I have been using soy wax more this year to create batik designs on my clothing, and really love the results! So I decided to go a little beyond just single images on t-shirts... this time, I am working on a rayon poncho, using found objects to stamp designs with wax, followed by brushing on dyes.  Here's a picture of the front... still have to dye the back, but because of the size, I have to do it in sections, then let the dyes dry before moving to the next section.

Once I finish the initial dyeing on the back, I plan to do some more waxing, then I may overdye the whole piece with black, or I may decide to continue brushing on dyes, using some different colors.  My dilemma right now is whether to leave some of the piece un-dyed... I like the white showing through, but I am concerned that the dye may bleed and discolor the white.  So I have to give it some thought before I progress much further.  I will post a picture of the final piece soon! 
 

Tuesday, May 17, 2011

Color experiments

Anyone who knows me (even slightly) probably knows I'm crazy for color!  Been that way as far back as I can remember!  And the brighter the better... pastels just don't do it for me!  So it should be no surprise that the experiment I did in the picture below made my pulse quicken the minute I checked on it:
I'm experimenting on cotton muslin to test some fold and dye methods, but was also trying to simulate some colors I have seen on "mudmee" tie-dyed garments, which have unusual shades of color.  My theory is that the "mudmee" colors are a result of overdyeing garments that started out black, then were discharged with a bleaching agent then overdyed.  But I have also seen some "mudmee" items that don't seem to have any black in them at all.  Today, I was experimenting with using a syringe to create lines in a circular fan-fold, and also decided to fan-fold a section, dye one side with a couple of colors, and dye the other side with other colors.  I am using a combination of Dharma Trading's Hot Pink, Lemon Yellow, and a Teal Green that I created with Turquoise and lemon yellow.  At any rate, after I had 'batched' the circular fold with just black dye, and had applied some dyes to the regular fan fold, I cut open the circular shape and just drizzled some of each color in a circular pattern and let the piece 'batch' on a rack for awhile, then opened it up.... woof!  I have only come close to the effect I got on the circular area using sharpie pens and alcohol before.  Now I know I can get similar results with dyes, and I'm excited about trying this on clothing pieces! 
I do love experimenting on fabric scraps, but the true test is how it works on shirts, so tomorrow will be my 'Dress Rehearsal'... stay tuned!

Saturday, January 15, 2011

Thinking outside the box

I love to visit the hardware store... I can find the best things there for my dyeing! The other day, I was looking through one of my books on Shibori Techniques. I had seen a photo of fabric dyed using bamboo rings to resist the dye. The technique is called 'chikuwa shibori' if you want to search for it on the internet. Anyway, I liked the pattern, but couldn't figure out where I would be able to find bamboo rings. Off to the local Home Depot to search for alternatives.
What I ended up with was a bag of 1/2" PVC couplings from the plumbing section... 25 for $4.00! And just last week, I went to lunch with a friend to a Japanese restaurant, so I had a pair of wooden chopsticks... just the right size to push fabric thru the coupling! I pre-soaked my 1/2 yard of kona cloth in soda ash solution, then folded in half, pushed the couplings on - I think I got about 12 on - then applied hot pink, light fuchsia, rose red and maroon dyes... let it soak for at least an hour, then rinsed/washed, and here is the result:
Now, I will tell you that the result does not look like the photo in my Shibori book. The Shibori example is squarer and the markings are very distinct. But since I wasn't trying to exactly replicate the design... my aim was to see what would happen if I used the couplings... I am very pleased with the result, and plan to try this next on a shirt to see how it does. One of the things I am really enjoying now is that I am not afraid to experiment! I invested a few dollars and some fabric in an experiment and learned a new technique! That's what makes this such a rewarding art form... I am not confined to doing things 'just so'... I get to play! Almost as good as finger painting!

Friday, January 14, 2011

Silk/Salt dyeing - second layer

After letting the scarf from yesterday's post dry, I scraped off the salt and found minor markings. I used light colored dyes, and silk salt I have had for years, and the result was not satisfactory overall. But I know from experience that sometimes, further layers or techniques can improve a project. So today, I mixed up some lemon yellow and bright green dyes, and pulled turquoise, royal blue and lilac from my stash. I also dug out my rock salt. Instead of painting on the new layer, I used an eye dropper to drizzle the dyes over the original layer of dyes. At first, it looked a little dorky, but since I have the stretcher system slightly elevated on one end, the dyes are spreading slowly over the surface of the scarf. I didn't saturate the silk, just left it damp. After applying the dyes, I sprinkled the rock salt on sparingly. Here is how it looks now, as it slowly dries in my garage:

I'll post pix when it dries, and decide then if I need to do more or if it's ready to steam set the dyes. I am also anxious to try using alcohol/water to create interesting effects, but not sure if I will do that on this scarf or save that for another experiment! More to come...

Tuesday, November 30, 2010

Two projects

Continuing on my list, experimented yesterday with dyeing fabric that had a white design printed on a white background. The first is a butterfly pattern, and I applied unthickened procion mx dyes to a piece of the fabric which had been soaked in soda ash solution, then dried:

I used a 3 inch wide foam brush to apply the dyes, creating some wavy stripes, slightly overlapping the colors. I call this "Waves of butterflies", and I used part of the fabric to create a cell phone case:

I actually started another where I was outlining the butterflies with free-motion quilting, but I realized that would be a lot more labor intensive, so I ended up just quilting along the flow of the color bars... much easier and quicker!
So I have now made 3 cell phone cases, and I have removed that from my project list... not because I won't be making any more, but because I feel comfortable enough with the concept to feel like I don't need to keep it as a 'to do' on my board.
Meanwhile, I also did another experiment with a different white-on-white fabric, and I'm not as pleased with the results:

I used my eyedropper here to apply the dyes to the pre-soaked and dried fabric. I had laid the fabric flat in a bin, and really don't feel that the dye worked well here... I love the fabric, but I think next time I will either apply with a foam brush or roller, and I want to try this fabric with a bronze dye with maybe a touch of orange. I will post more pix as I go... meanwhile, this item stays on the project board for awhile longer. I still have at least 8-10 different fabric samples to experiment with, including a number of black/white, and a white with gold print... fun!
On an unrelated note, I posted an item on my Facebook page that our semi-wild kitty, Shrekkie, actually spent the whole night in the house last night, comfortably perched on a chair in the living room! I think he gets it that life can be a lot more comfy in the house in the winter than outside, freezing under the house! He's such a sweetie! Looks kinda like a furry bear when his fur is standing out, see?

Sunday, July 11, 2010

Dyed fabric - what next?

The fabric I posted about yesterday spent the night on my design board... I came and went several times, studying the piece to see if I got any ideas of how to use it. Today, I split it into two pieces... one to mount on stretcher bars, the other to divide into smaller pieces. I mounted one piece on an 8X10 canvas and coated with a water-matte medium solution. The others I am still auditioning to see how I like the way they look. Here are the audition photos, along with a picture of the one I have already mounted:
This is the one I mounted and coated with water-matte medium

These two are just pinned to a canvas to see how they look. I have left the edges frayed.
I'm not totally sure I like the way the mounted one looks, and may have to consider mounting the others in a different way, but I really love the color and composition! The first one, if rotated 90 degrees to the left, makes me think of the oil spill. The third one definitely reminds me of the fire we just had on our nearby peaks. And I still have the large piece yet to mount... I'll post a picture when I have that done.

Saturday, July 10, 2010

OMG!!!! Color!!!!

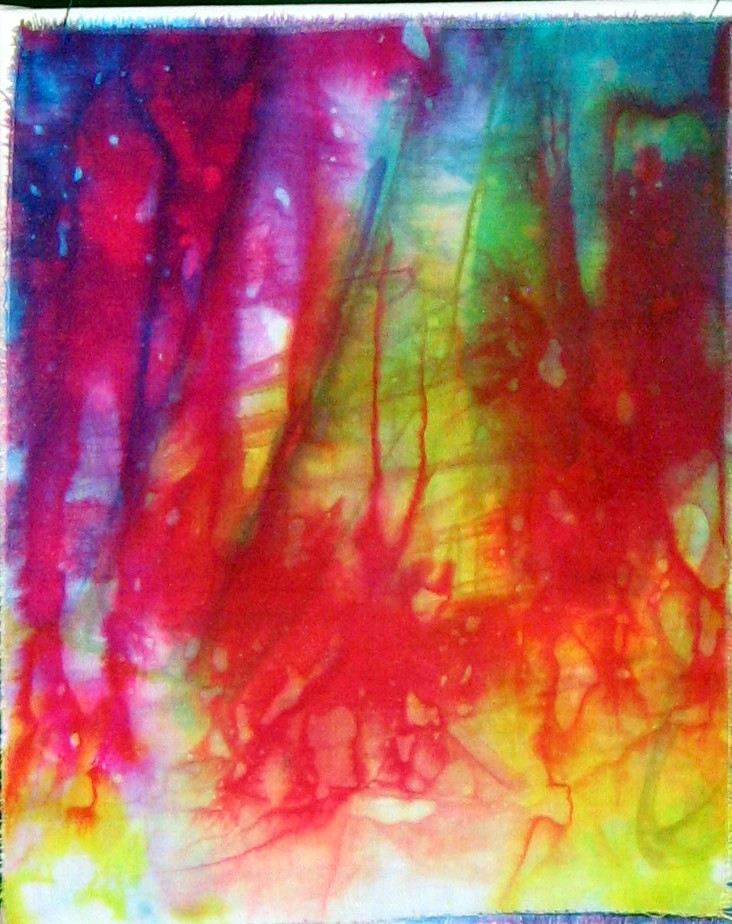
Have I ever mentioned how much I loved to finger paint when I was a kid? It was too exciting! Well... I never felt the same about any other art form until I started dyeing back 12+ years ago. And you would think by now that the excitement would have worn off, right? NOT! As I mentioned in a recent post, I bought a book about dye recipes, which I thought would be a nice reference in case I ever want to create a specific color. But tucked in the back of the book is examples of several dyeing techniques... most of them I have tried already in one fom or another, but today I tried one I have been wanting to experiment with for quite awhile. I laid heavy plastic on a table, then took a yard of soda-soaked fabric and flattened it over the plastic. Then I used the primary colors - Lemon Yellow, fuchsia red and Turquoise - and squirte them out randomly on the fabric. Then, being careful to rinse my gloves frequently, I smooshed the colors together to blend them. Then - and this was a sudden inspiration - I kind of crunched the fabric up and swirled it a little:


Then I added some rock salt to see if I could get any salt markings on it. I was also interested in whether the crunching/swirling would add markings. I waited about an hour, then rinsed/laundered and dried. Here is the result:

And a closeup of some of the salt markings:

I am really jazzed with the results! Needless to say, I plan to try this on clothing, and with other colors on both fabric and clothing! What a rush!

Sunday, March 7, 2010

Inspired to experiment

Two of the bloggers I follow regularly - Cynthia St. Charles and Connie Rose - have recently posted about their dye experiments. Cynthia recently tried snow/ice dyeing, and Connie did some comparisons between dyeing dry and wet fabric, presoaked in soda ash solution and applying the soda ash after the dyes were applied. In both cases, they used a soda ash solution with salt added, which I have not tried yet. So I decided to do some experiments similar to Connie's with salt added to my soda ash... i have previously posted about my ice/snow dyeing experiments.
All of today's pieces were scrunched and placed in small containers first.
Here are my results from today's batch:
The pair above were processed as follows: Left sample I soaked in the soda ash/salt solution for 1 hour, then applied the dyes and batched for 1 hour. Right sample I dyed the fabric dry, let set for 1 hour, then added the soda ash/salt solution and batched for an hour.

The next pair were done as follows: both pieces were presoaked in warm water for 30 minutes; excess water was squeezed out, then scrunched and placed in small containers.
Left sample was soaked in soda ash/salt solution for 1 hour, then the dyes were applied and batched for 1 hour; right sample was dyed, set for 1 hour, then soda ash/salt solution was applied and batched for 1 hour.
In all cases, I used 1 1/2 ounces of dye, and 1 1/2 ounces of soda ash/salt solution.
I have to say that adding salt to the soda ash has created much more interesting, distinct markings than my regular method with just soda ash. Cynthia e-mailed me to tell me she normally used salt to achieve better markings, and I'm sold! And I like seeing the different effects that can be achieved by varying things like starting with wet or dry fabric, pre-soaked or soda soaked after dyeing. Thanks ladies for your inspiration!