Friday, July 30, 2010

More Flash Flood news

Yesterday we had more flooding in the area, but the good news is all the trenching and other mitigation efforts kept the floodwaters off of our land. Here are a couple of shots I got of the new 'river':

This is looking from our yard to the property next door as the water flows down from the street above through the neighbor's property, then turns south toward their road. The house that is sandbagged is on the lot further to the east of the trenched lot, and they didn't want any trenching done on their land...

Wednesday, July 21, 2010

The morning after

This is the scene that greeted me this morning:

I'm going to take this as a sign of hope, while preparing for the probability of still more flooding to come...

Flash Flooding!

We got hit with extensive flooding in our area yesterday... runoff from rain that hit the peaks where we had the fire last month. We now have a river running through the lower corner of our property:

This shot is looking at the flow from our next door neighbor's yard. The water and debris took down the fence, and pretty much ignored the sand bags and straw wattles we had positioned to divert the flow away from the garage.
This shot is looking from our back deck at the flow across our property, with neighboring properties in the background. The two properties in the background were heavily flooded, and the property to our east had flooding across their horse pasture.
At one point, we got in our Jeep and drove out to the highway, which was a little dicey at spots. We live on dirt roads unmaintained by the county, and at the end of the road where we turn towards the highway, the runoff coming down from the mountain was very strong. Once on the highway, we discovered all vehicles had been stopped in both directions due to water overflowing from the side ditches. We stayed out there for about 30 minutes waiting for the runoff to subside, then I ended up hiking back to our house while my hubby went back to get the Jeep. Needless to say, I was pretty muddy by the time I got home! No, didn't get pictures of that! But stay tuned... we are in for more of the same for at least the next 45 days, and I'm sure to get more pictures. Sadly, a 12 year old girl from the area lost her life because she went out to see the runoff and fell in and was swept away. I don't think a lot of people were as prepared for the seriousness of this situation as they could have been, and I don't even know if we are as prepared as we should be! I have a 'Go Bag' packed now in case, but don't know where we could go to be safer than we are right here! Our biggest danger is being cut off from the highway if the roads are impassable. We have 4-wheel drive, but it's an older vehicle and I'm not sure it would do too well on really degraded roads. Guess we'll find out!

Sunday, July 18, 2010

Uh-Oh!

I was treated to a rare sight yesterday evening... little skunks playing and foraging for bugs:
Unfortunately, they have gotten under the house, and I think their mama is dead under there. So I will have to call the local pest control folk to trap and relocate them, and retrieve and dispose of mama. They are the cutest little guys, though!

Saturday, July 17, 2010

Upcoming experiments/storm update

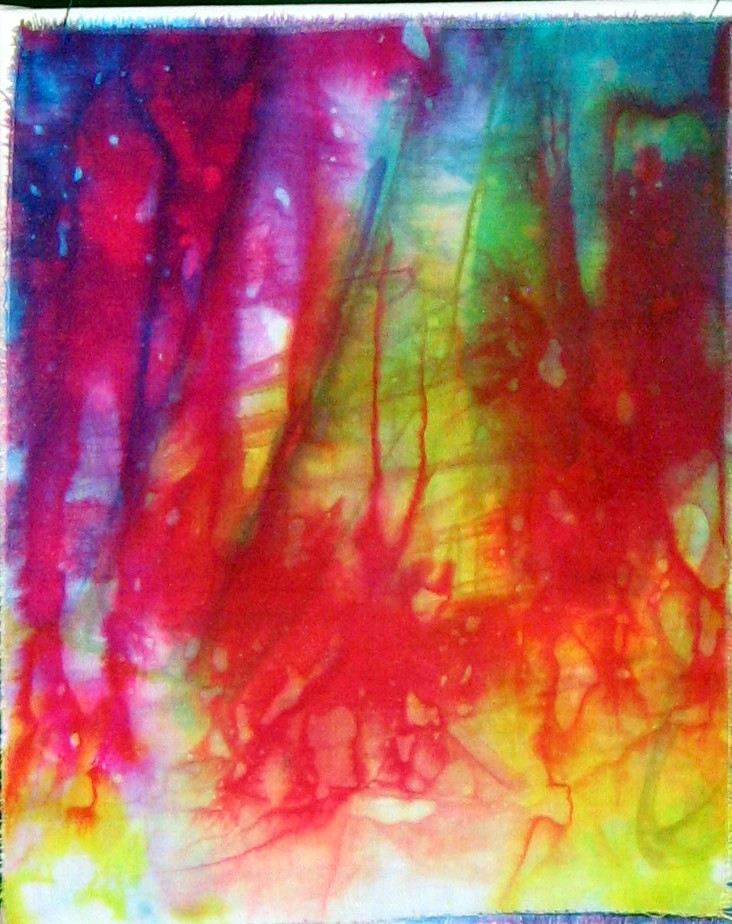
Yesterday, my friend Joyce and I visited 5 fabric shops in the area, and my quest was to find black and white or white on white fabrics. I plan to experiment with overdyeing them. Believe me, with all the colorful fabrics in these shops, it was a struggle to stick to my guns, but I ended up finding a good selection to play with:

Unfortunately, you can't really see the designs on the white fabric too well... the one on the left has butterflies, the one on the right looks like egyptian hieroglyphics, and the rolled one on the right has sort of lozenge shapes. The square on the upper right makes me want to color with fabric markers or sharpies! I can't wait to play with these, and will post the results when I have some.
Did I mention that this little adventure was a 'Shop Hop'? I have no idea if this happens anywhere else, but once a year these shops put this event together, and if you buy a 'Passport' and present it to the clerk when you are making your purchase, you get a discount on your purchase, they stamp your 'passport', give you a charm pack of fabric squares, and you get a chance to win a prize if you visit all the shops. Well, we won't be eligible for the drawing, but we got the discounts and charm packs, and Joyce donated hers to me because she doesn't make anything with such small pieces of fabric, so I have those to play with too!
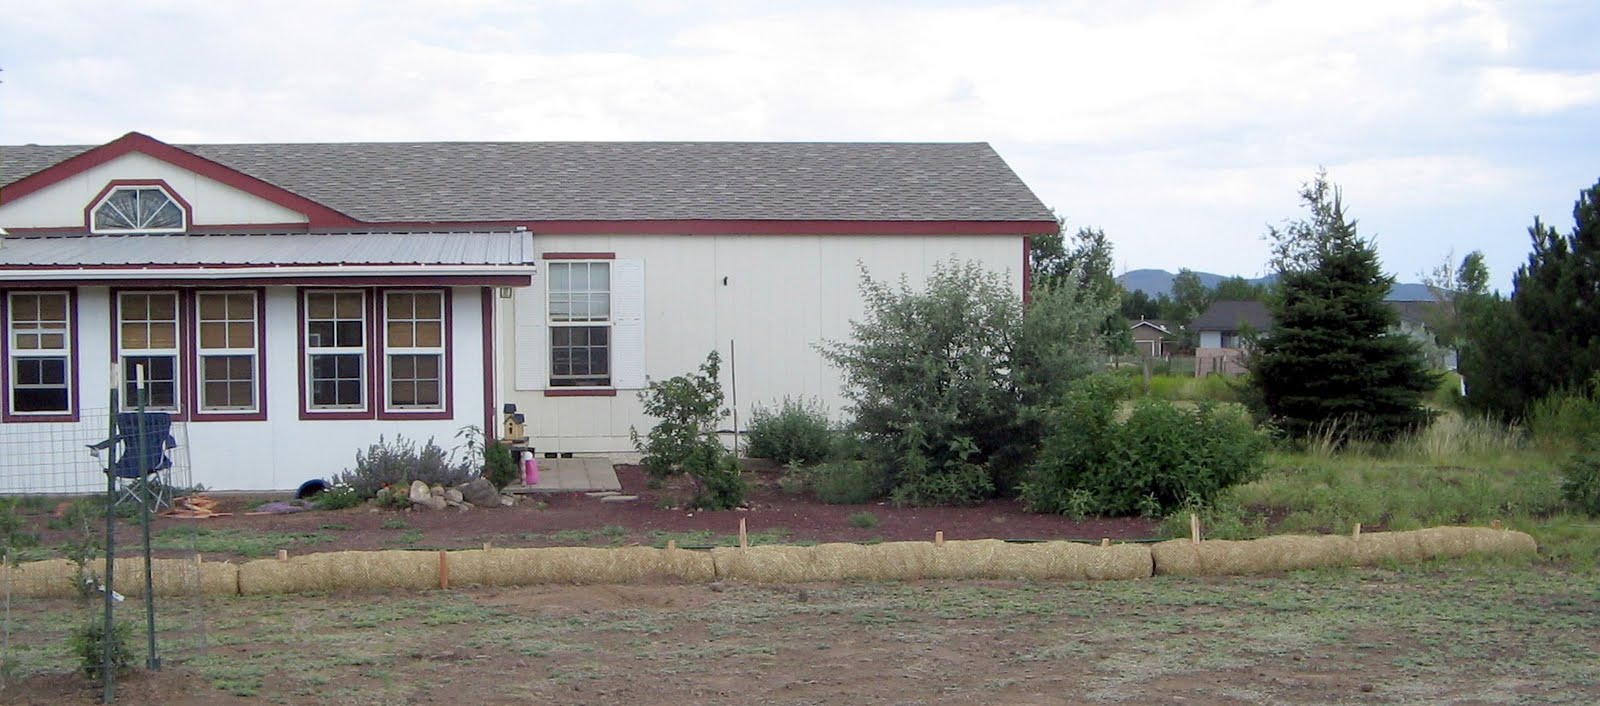
Meanwhile, by the time I got home, I discovered we had our first flood while I was away, but it wasn't bad! Floodwaters crossed over a corner of our property that was closest to our garage, but flowed away from it. A friend loaded up her truck at the sandbag station and brought it over, so we have started a barrier to prevent any further migration towards the garage, should the flow continue in this area:

My hubby and I took a tour of the properties uphill from ours, and they got hit bad up there. One home had floodwaters come inside. Our neighbors to the left of this picture had quite a bit of flooding in their yard, but had sandbagged in front of their home, so hopefully didn't suffer any damage inside. One street over apparently got hit really bad, and our neighbors to the north had a lot of water washing over the road, but again had sandbagged well enough to keep the flow out of their yards. This is going to be a really interesting Monsoon season for sure!

Thursday, July 15, 2010

Resist dye experiments

Every once in awhile.... no, that's a LIE! I always want to experiment with dyes, resist methods, patterns... it just calls to me! So yesterday, I got "the call", and decided to revisit a method I first tried a few years ago, resist dyeing using CD's and clamps. I dyed a length of fabric with lemon yellow, light orange and scarlet to start with. Then I accordion folded the fabric, then covered the resulting folded fabric with CD's top and bottom, anchored with spring clamps:
Then I overdyed the exposed fabric with 3 colors, ombre-style: Maroon, Burgundy and Eggplant. After laundering and drying, I cut off a portion to further experiment with, forgetting to take a picture first... I make a really poor scientist! Anyway, here is a picture of the remaining fabric as it came out of the above dyebath:

I think there is enough here for you to see the ombre-effect.
With the two pieces I cut from the original, I refolded to match up the circles, then on the fabric on the left below, I used two rectangle-shaped wood pieces to partially cover the circles, using spring clamps to secure them; then I overdyed the exposed fabric with Royal Blue. On the fabric to the right, I used two oval wood shapes to partially cover the circles, again using spring clamps to secure them. Then I overdyed the exposed fabric with Cerulean Blue:
If you click on the images, you will see some of the blues have overdyed lighter areas to create some focal points. What I am amazed at is that the original circles were really transformed into different shapes! I was expecting some color layering but thought I would see the outline of the circles a little clearer, and maybe if I had overdyed with lighter dyes I would have. But I love the shapes that I get when I use this method to resist-dye. Now I need to get busy and use some of this fabric!

Wednesday, July 14, 2010

Aftermath of the Schultz Fire

We recently had a large fire sweep across the east side of the San Francisco Peaks here in Flagstaff, causing many of us who live in the area to evacuate our homes. Fortunately, we had a top notch group of firefighters, forest service, hot shots, etc., who worked tirelessly to contain the fire, and there were no lives or structures lost. But now we are having to prepare for the almost certainty that we will be having flash flooding in the area for at least the next 5 years as the vegetation begins to come back, and the soil is restored. Currently, we have large helicopters dumping large loads of mulch material to help absorb rain, but in the meantime, the ever-present winds are causing a lot of dust swirling along the mountain side. I captured several shots of one in progress this afternoon, and it's really quite a sight:


On hindsight, I should have grabbed the video camera, but my first impulse is always the digital for stills. This is about as close as I want to get to anything that resembles a tornado!
Meanwhile, I dug a shallow trench yesterday across the yard in front of our house, and today a friend came with his truck to pick up straw wattles for us, then pounded the stakes thru them to anchor them in case we get sheet flooding in our yard. This will help keep the waters from flooding under the house, or seeping into the patio room:
I still have about 5 left to go along the side of the garage, then maybe I will get some sandbags for the front of the property... we get lots of water flow across the road to our house, which is unpaved and currently full of ruts from the winter snowmelt. If the water flow gets deep, it could run onto the property from the road, but I think the biggest problem has been dealt with. Such a fun summer we are having!

Sunday, July 11, 2010

Dyed fabric - what next?

The fabric I posted about yesterday spent the night on my design board... I came and went several times, studying the piece to see if I got any ideas of how to use it. Today, I split it into two pieces... one to mount on stretcher bars, the other to divide into smaller pieces. I mounted one piece on an 8X10 canvas and coated with a water-matte medium solution. The others I am still auditioning to see how I like the way they look. Here are the audition photos, along with a picture of the one I have already mounted:
This is the one I mounted and coated with water-matte medium

These two are just pinned to a canvas to see how they look. I have left the edges frayed.
I'm not totally sure I like the way the mounted one looks, and may have to consider mounting the others in a different way, but I really love the color and composition! The first one, if rotated 90 degrees to the left, makes me think of the oil spill. The third one definitely reminds me of the fire we just had on our nearby peaks. And I still have the large piece yet to mount... I'll post a picture when I have that done.

Saturday, July 10, 2010

OMG!!!! Color!!!!

Have I ever mentioned how much I loved to finger paint when I was a kid? It was too exciting! Well... I never felt the same about any other art form until I started dyeing back 12+ years ago. And you would think by now that the excitement would have worn off, right? NOT! As I mentioned in a recent post, I bought a book about dye recipes, which I thought would be a nice reference in case I ever want to create a specific color. But tucked in the back of the book is examples of several dyeing techniques... most of them I have tried already in one fom or another, but today I tried one I have been wanting to experiment with for quite awhile. I laid heavy plastic on a table, then took a yard of soda-soaked fabric and flattened it over the plastic. Then I used the primary colors - Lemon Yellow, fuchsia red and Turquoise - and squirte them out randomly on the fabric. Then, being careful to rinse my gloves frequently, I smooshed the colors together to blend them. Then - and this was a sudden inspiration - I kind of crunched the fabric up and swirled it a little:


Then I added some rock salt to see if I could get any salt markings on it. I was also interested in whether the crunching/swirling would add markings. I waited about an hour, then rinsed/laundered and dried. Here is the result:

And a closeup of some of the salt markings:

I am really jazzed with the results! Needless to say, I plan to try this on clothing, and with other colors on both fabric and clothing! What a rush!

Monday, July 5, 2010

Slow Cloth update

Okay, as promised I just took pictures of my progress on "Astral Exhibit" to keep you in the loop. I just looked back, and the last time I can find a post about this piece is from January 20! REAL SLOW CLOTH!!! So here is a photo of the overall piece as it is now:

I was working on the large comet in the upper left corner in January, and finally finished outlining it with metallic thread a week or so ago... what a chore! I have not used metallic thread before, and found it really challenging. Here is a closeup:

I tried using beads on the tips as embellishments, but ended up removing them as they did not add to the overall look I was trying to achieve. That's when I decided to outline the comet with metallic thread. I wanted sparkle, but the thread was difficult to manipulate. The other two comets will be outlined with regular embroidery floss, and I will figure out a way to embellish them differently.
On the bottom left is one of the "Asteroids" with a center embellishment made of tyvek. I first painted a piece of tyvek with Lumiere paint, then used my iron to heat it, causing the bubbly texture. I will be putting the same center in the other two "Asteroids" when I get further along.

If you're wondering what caused me to create this particular design, I can tell you it was total whimsy. I was auditioning some of my hand-dyed fabrics trying to come up with a way to use them... as I moved the pieces around on the design board, I started to "see" something, and by the time I began to work on the piece, it had evolved to "Astral Exhibit". We have an Observatory here in Flagstaff, and that may have also inspired me, along with the fabulous view of the stars we get here on clear nights! We are a low-light community due to the Observatory, so that keeps the skies darker than in the more populated areas. Great place to see the Milky Way and comet showers!
Okay, back to work... I'll post more soon!

The Process Pledge

I just took the Process Pledge, which means I am going to try and be more consistent with posting progress reports on my various projects, instead of just posting pictures of the end results. I have a "Slow Cloth" in progress... actually it has had very little attention from me since I started it months ago... but I am ramping up my efforts on it of late, and will take a picture and describe my progress later today. Meanwhile, over on my other blog, www.hippiewear.blogspot.com, I have promised to post video clips of how to create various tie-dye patterns. This works on both clothing and fabrics, so if you are looking for ways to create interesting, colorful one-of-a-kind fabrics, check there from time to time. Stay tuned!